Direct Print Documentation

Step-by-step guide to install.

Installation

Follow these steps to download and install on your computer.

1

Download the Software

Visit the official QZ Tray download page and click Direct Download for your operating system (e.g. Windows Intel).
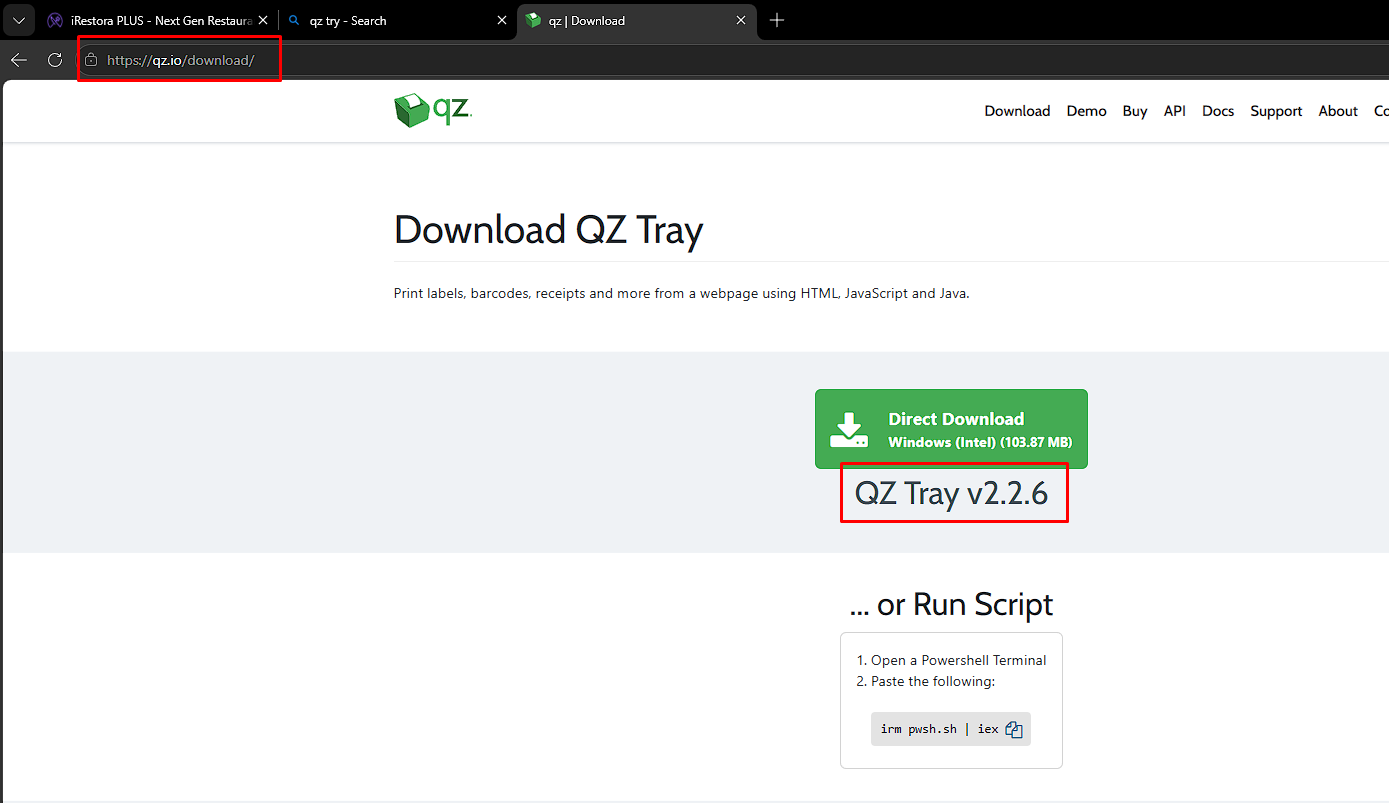
Download from qz.io or use the bundled installer: qz-tray-2.2.6-x86_64.exe
QZ Tray download page showing Direct Download button for Windows
Download QZ Tray from the official website or use the local installer in the Software folder.
2

Install and Verify QZ Tray Is Running

Run the downloaded installer and follow the setup wizard. After installation, QZ Tray starts automatically and appears in the system tray (near the clock).
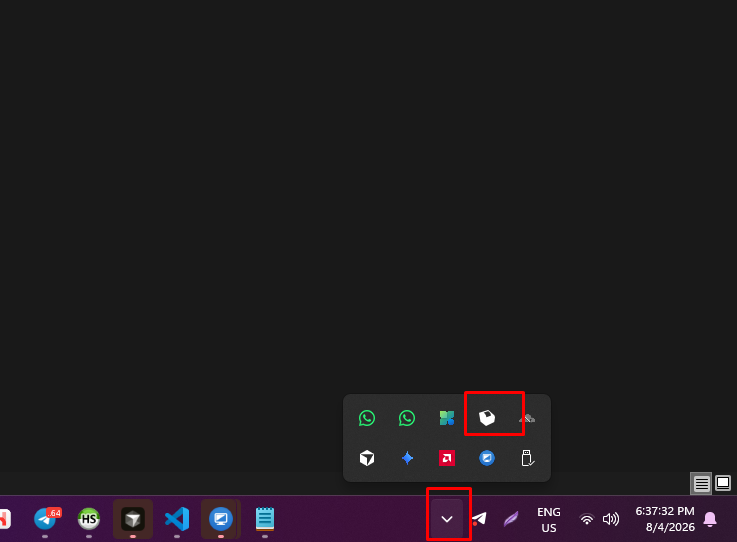
  1. Click the up arrow (^) in the Windows taskbar to show hidden icons.
  2. Look for the QZ Tray icon (white cube/box shape).
Tip: Enable Advanced → Automatically start so QZ Tray launches every time you log in.
QZ Tray icon visible in the Windows system tray
QZ Tray running in the system tray after successful installation.

Configuration

Configure QZ Tray security settings and certificates so your web application can connect without repeated prompts.

3

Block Anonymous Requests

Right-click the QZ Tray icon in the system tray and review the security options:
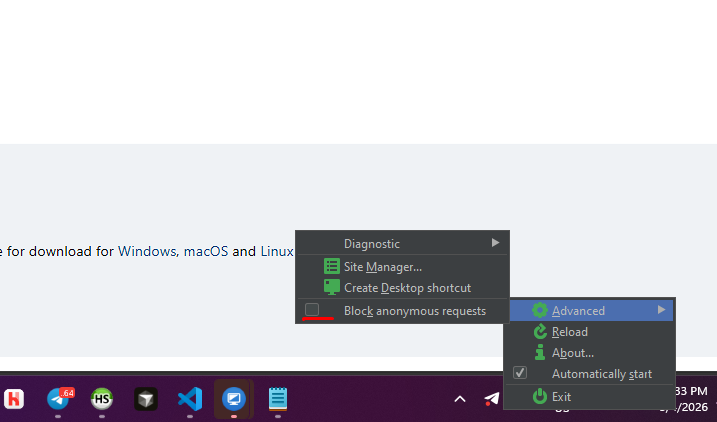
  1. Right-click the QZ Tray tray icon.
  2. Enable Block anonymous requests to prevent untrusted websites from connecting without a valid certificate.
  3. Use Advanced → Automatically start to keep QZ Tray running in the background.
QZ Tray context menu showing Block anonymous requests and Advanced options
Right-click the tray icon to access security and advanced settings.
4

Open Site Manager

Site Manager controls which websites and certificates are allowed to communicate with QZ Tray.
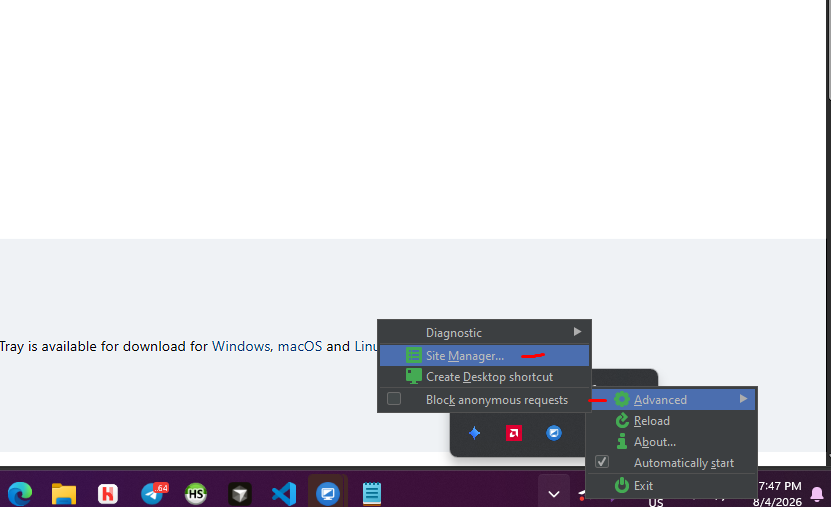
  1. Right-click the QZ Tray tray icon.
  2. Go to Advanced → Site Manager...
QZ Tray menu with Site Manager option highlighted
Open Site Manager from the Advanced submenu.
5

Add a Certificate to Allowed Sites

In Site Manager, add your application's digital certificate to the Allowed list so it can connect securely.
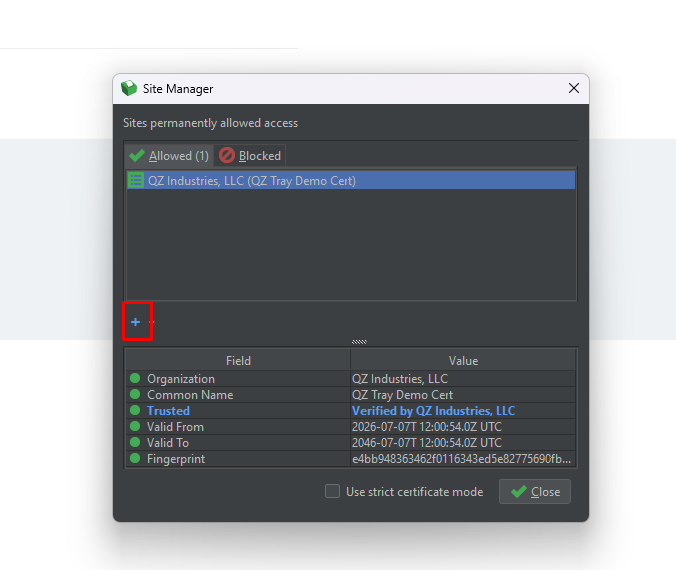
  1. In the Site Manager window, select the Allowed tab.
  2. Click the blue + button below the site list.
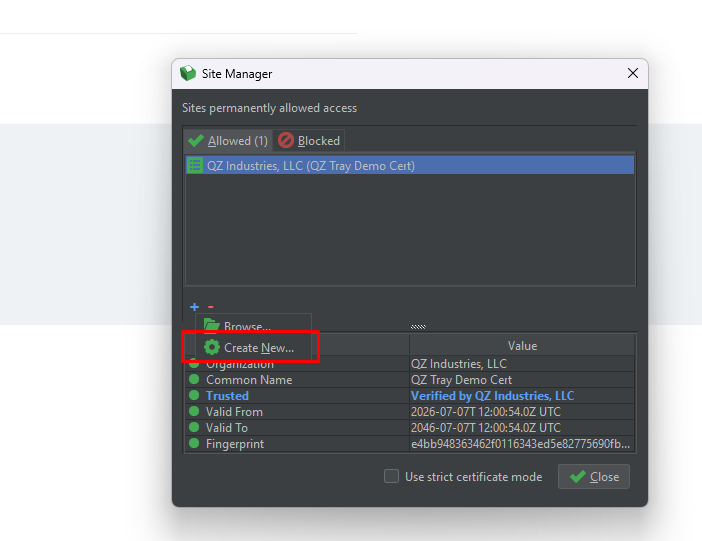
  3. Choose Browse... to import an existing certificate file, or Create New... to generate one.
Site Manager window with Allowed tab and add button
Site Manager — click the + button to add a new allowed certificate.
Site Manager showing Create New certificate option
Choose Browse to import a certificate or Create New to generate one.
Note: The demo certificate QZ Industries, LLC (QZ Tray Demo Cert) is pre-installed for testing at demo.qz.io. For production, use your own site certificate.

Usage

Once QZ Tray is installed and configured, connect your web application and start printing.

6

Test with the Demo Page

Before using your own application, verify QZ Tray works by opening the official demo page.
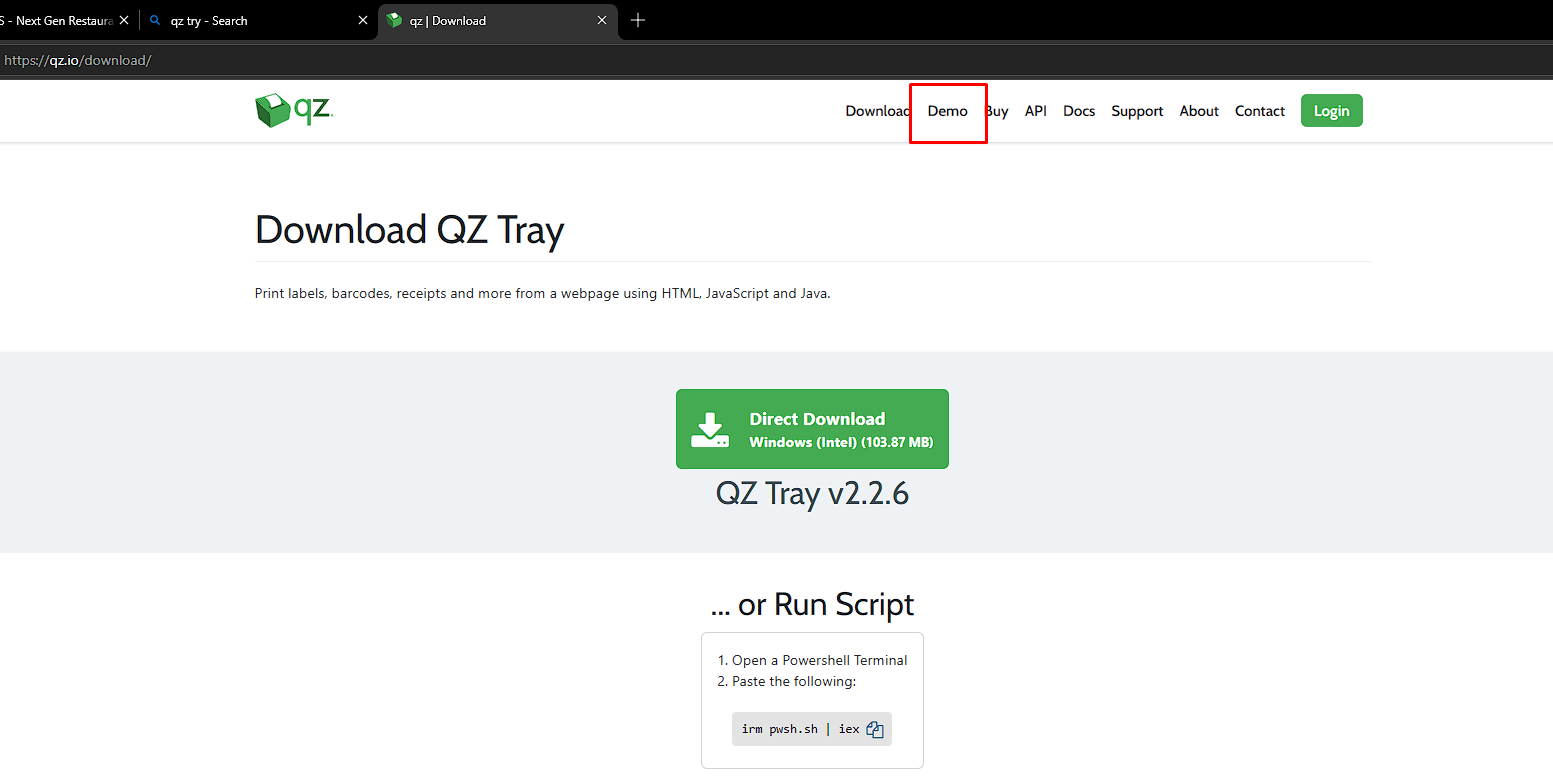
  1. Go to https://qz.io/download/.
  2. Click the Demo link in the top navigation bar.
  3. Or open https://demo.qz.io directly.
QZ Tray download page with Demo link highlighted
Access the Demo page from the QZ Tray website navigation.
7

Allow Browser Permission

When your web application first tries to connect to QZ Tray, the browser asks for permission to access local apps and services on your device.
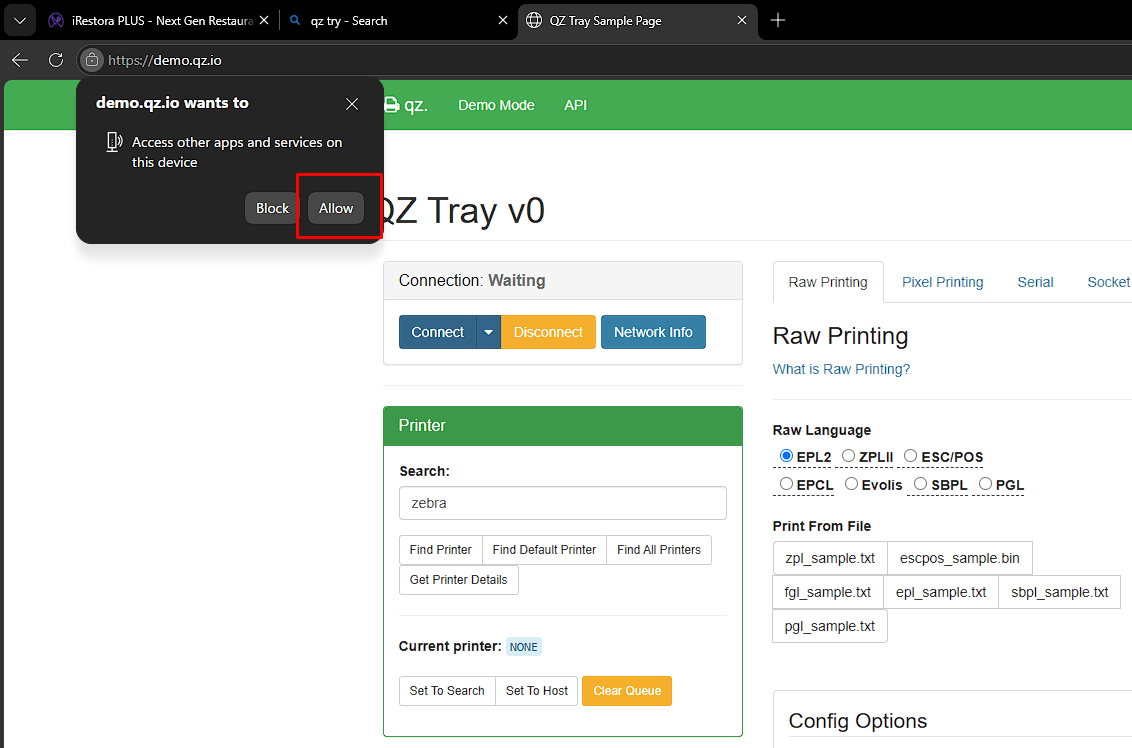
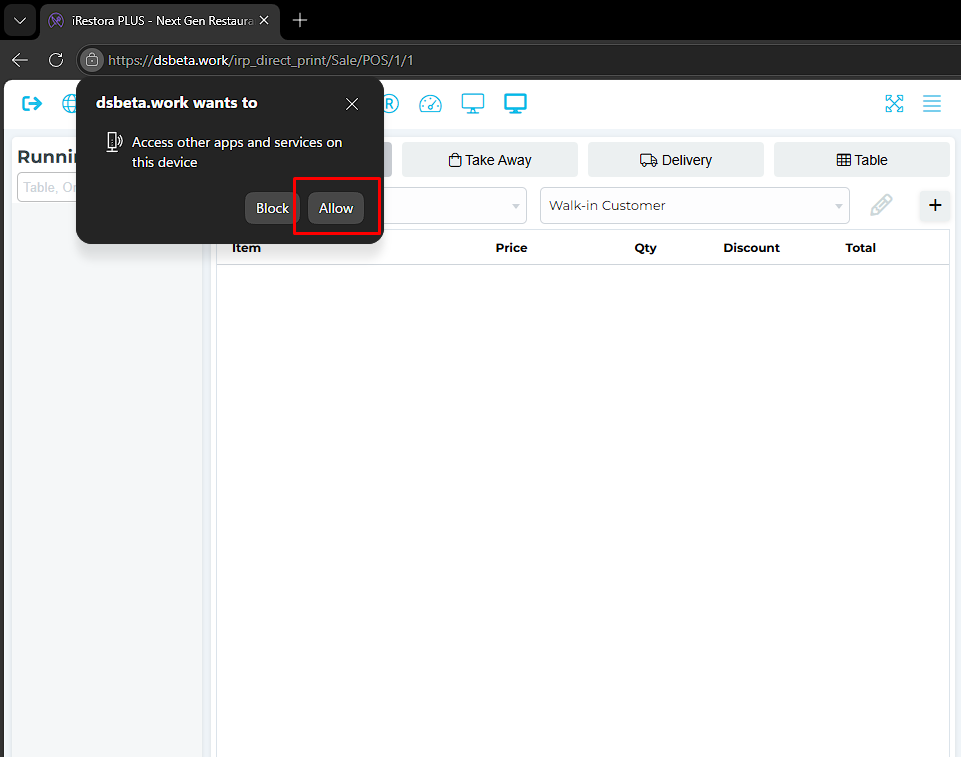
  1. A popup appears: "[your-site] wants to: Access other apps and services on this device."
  2. Click Allow to grant access.
Browser permission dialog on demo.qz.io with Allow button highlighted
Allow browser permission on the QZ Tray demo page.
Browser permission dialog on iRestora POS application
Allow browser permission when using your own application (e.g. iRestora PLUS POS).
8

Allow QZ Tray Connection

QZ Tray shows a security dialog when a website requests a connection.
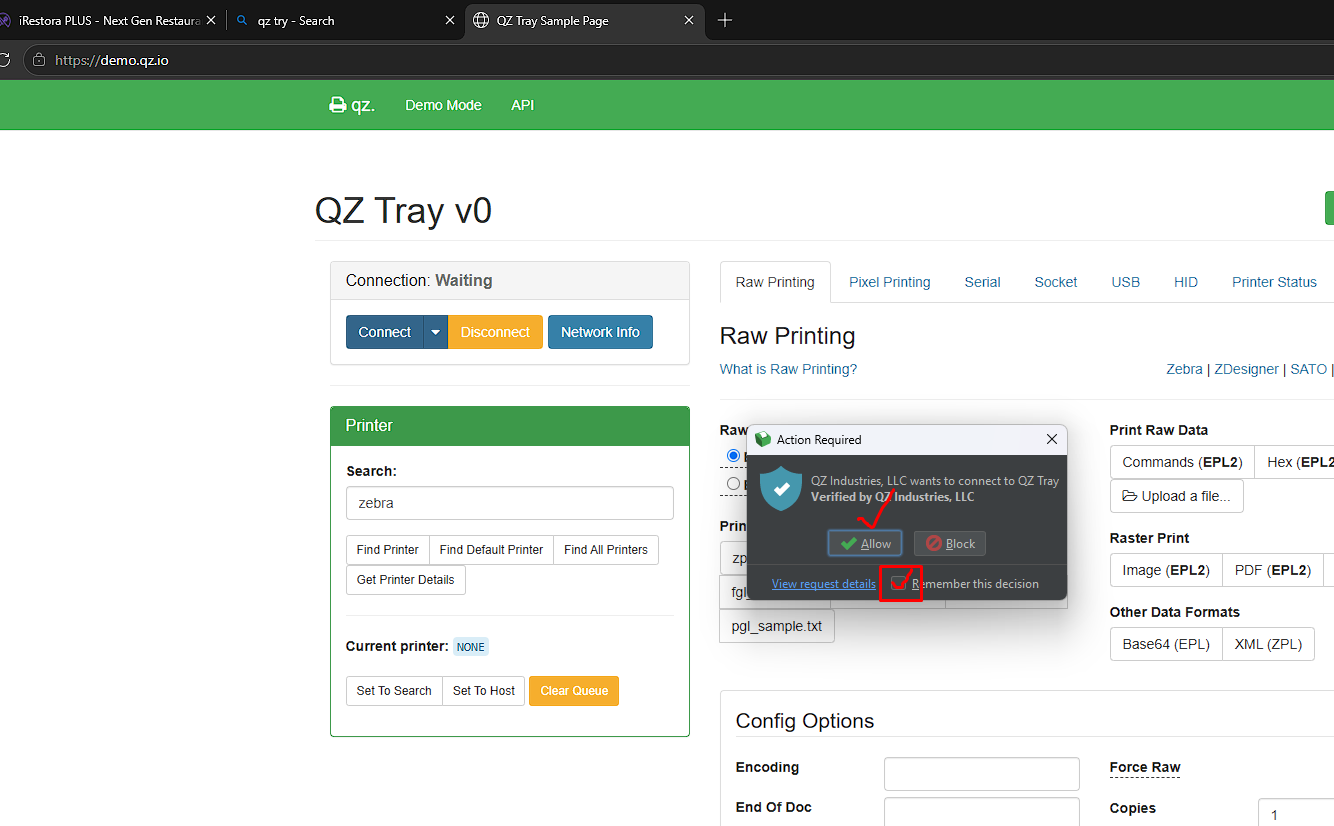
  1. When the Action Required dialog appears, click Allow.
  2. Check Remember this decision to avoid being prompted on every visit.
  3. On the demo page, click the blue Connect button if the connection is not automatic.
QZ Tray Action Required dialog with Allow and Remember this decision highlighted
Allow the connection and check "Remember this decision" for future sessions.
9

Verify Connection and Print

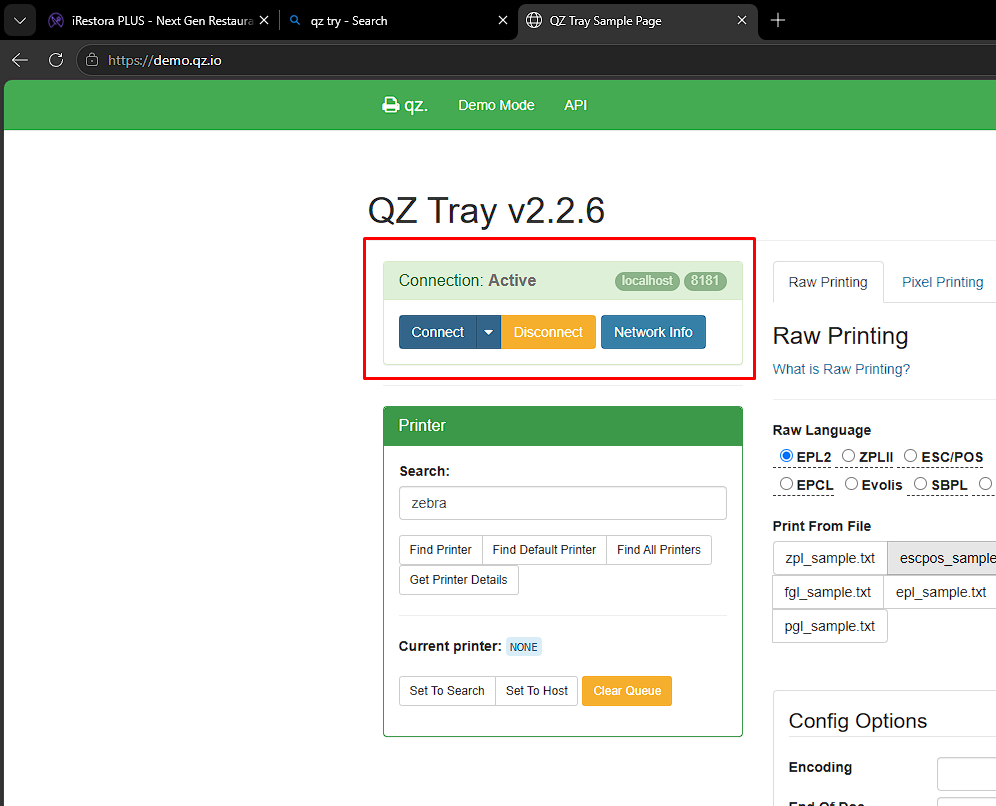
Once connected, the demo page shows an active connection and you can select a printer to send a test print.

  1. Confirm the status reads Connection: Active (connected to localhost:8181).
  2. In the Printer section, search for your printer (e.g. type zebra for Zebra label printers).
  3. Click Find Printer or Find Default Printer.
  4. Choose a print language (EPL2, ZPLII, ESC/POS, etc.) and click a sample file to send a test print.
QZ Tray demo page showing Connection Active status
Successful connection — QZ Tray is ready to receive print jobs.

Troubleshooting

Common issues and how to resolve them.